Introduction
Integrating Shopify with Dynamics 365 Finance and Operations (FnO) requires structured data management and seamless automation.
This blog covers how to create a setup table and page in FnO to securely store API credentials and endpoints.
In the next blog, we’ll create an automated batch job to push product data from FnO to Shopify, automating product creation on the e-commerce platform.
If you are new to this series, you can refer to my blog here for setting up the necessary Shopify components for getting started.
Pre-requisites
Shopify API credentials (API Key, API Secret, Auth Token)Access to the development environment in Dynamics 365 Finance and Operations.
References
Configuration
Step 1: Create the model and project
I'm going to be starting from scratch so I'll create a new model for this.
If you already have a model you'll be using, you can skip this part.
Open Visual Studio and click on Continue without Code.
Click on Extensions > Model Management > Create Model.
Give your model an appropriate name.
After everything is selected, click on Next.
Give your solution/project appropriate names and click on Create.
Step 2: Create Extended Data Types
Right click on the project, click on Add > EDT > String.
I've also created a Label file to store the labels.
In the properties of my EDT, I'll set the string length to 40 and set the label.
Similarly I create 2 more EDTs, with the Shopify Auth Token with string size 50.
Right click on the project, click on Add > Table.
Give it an appropriate name and click on Add.
Then, we'll drag the three EDTs into the fields section of table and set the label to the table.
I'll also add a Parameters Key from the Application Platform Module
Next, we create an index on the basis of the ParametersKey (renamed to Key)
Drag the Key field into the newly created index and be sure to set the "Allow Duplicates" property to "No"
Then we set the necessary properties.
This is useful as this will prevent multiple records in our setup table.
Then right click on the Methods and click on "New Method"
Then add this method logic.
Step 4: Create Form
Right click on the project, click on Add > Form
Give it an appropriate name and click on Add.
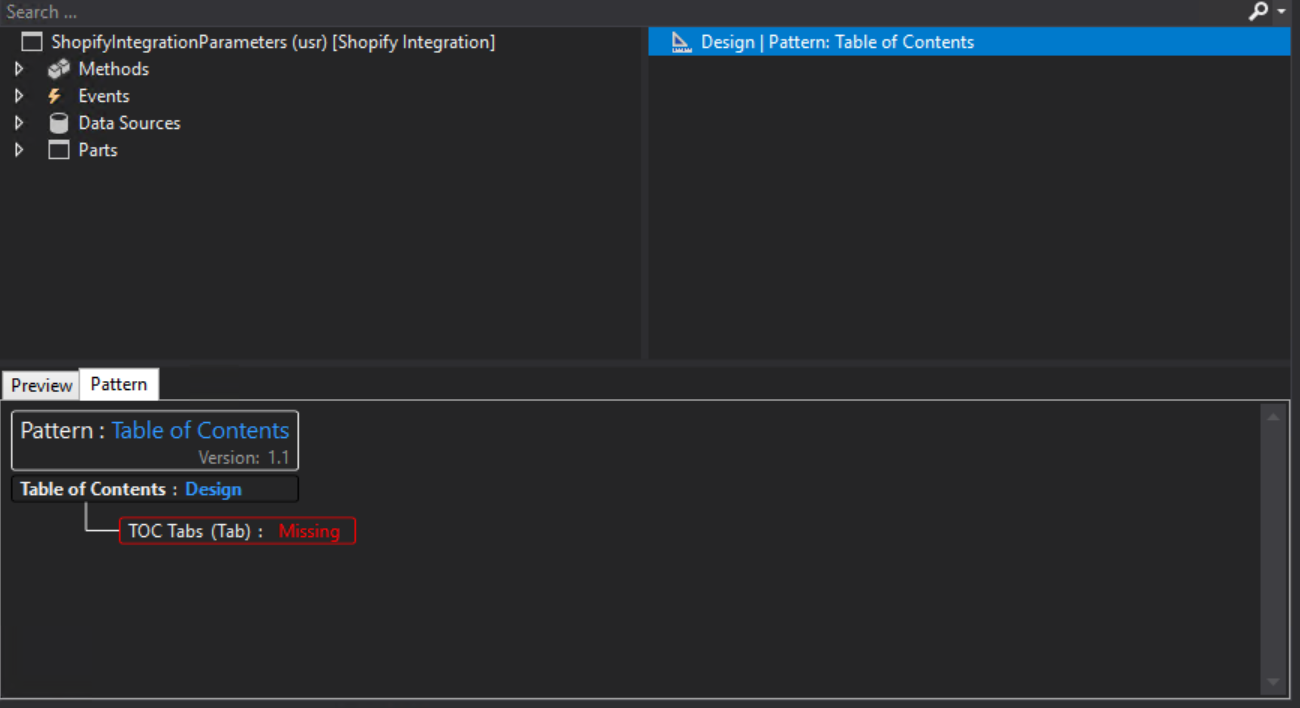
Right click on the Pattern > Apply Pattern > Table of Contents
Right click on the Pattern > New > Tab.
Next drag your table onto the Data Sources tab.
Select the datasource you just created and set the below properties.
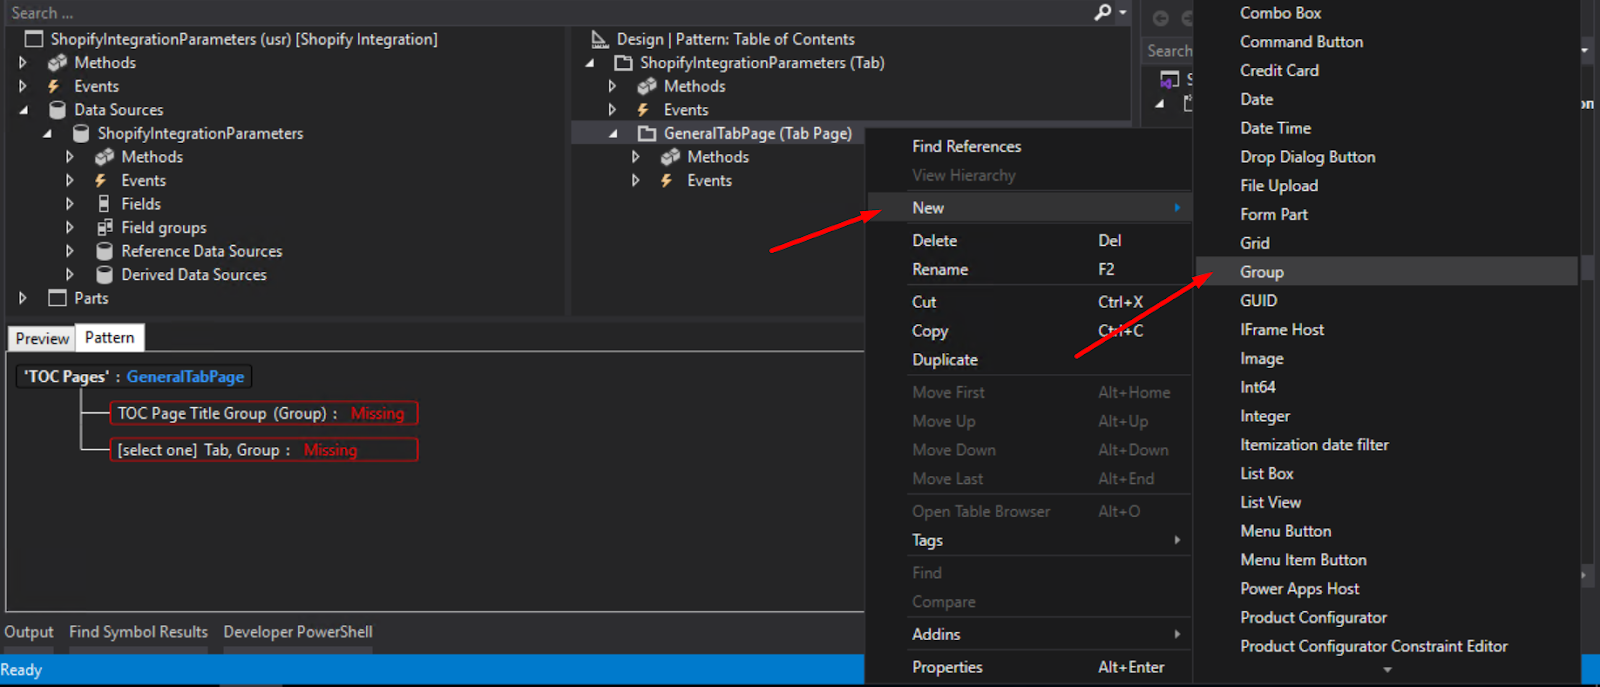
Next right click on your Tab and click on "New Tab Page"
Right click on the newly created tab page, click on New > Group
Right click on the Group > Add > Static Text.
Then, right click on the "GeneralTabPage" and add another tab.
Inside that, add another tab page (as prescriped by the pattern) and set the pattern of the inner tab page to be "Fields and Field Groups"
Inside this tab page, you can directly drag and drop your fields.
For the "Shopify Auth Token" set the "Password Style" property to "Yes"
Right click on Methods > Override > init.
Call the find method of the Integration Parameters in the init method of the form.
This ensure that the record is created if it doesn't exist already.
Step 5: Create the menu item for the form
Right click on the Project > Add > New Item.
In the menu click on User Interface and select Display Menu item.
Give it an appropriate name and click on Add.
Assign the appropriate label and set the form we just created into the object field.
Step 6: Extending standard menu
Go to Application Explorer > Click on User Interface > Menus > right click on "System Administration" and click on "Create Extension"
Go to Solution Explorer > Click on the newly created Menu Extension.
Right click on the title and click on New > Sub Menu.
Give it an appropriate name and an appropriate label.
Drag and drop your display menu item into the submenu.
Step 7: Configure Security
Right click on the project > Add > New Item
Go to Security and select Security Privilege.
Give it an appropriate name and click on Add.
Drag and drop your menu item into the "Entry points" tab of the Security Privilege.
Similarly create a Security Role and give it an appropriate name.
Then drag your privilege into the role.
Set a label to this role.
Build the entire project, sync it with database and deploy it.
Search for"Assign users to roles" to assign the security role to yourself.
Select the role and click on "Manually assign / exclude users"
Select your User and click on Assign to role.
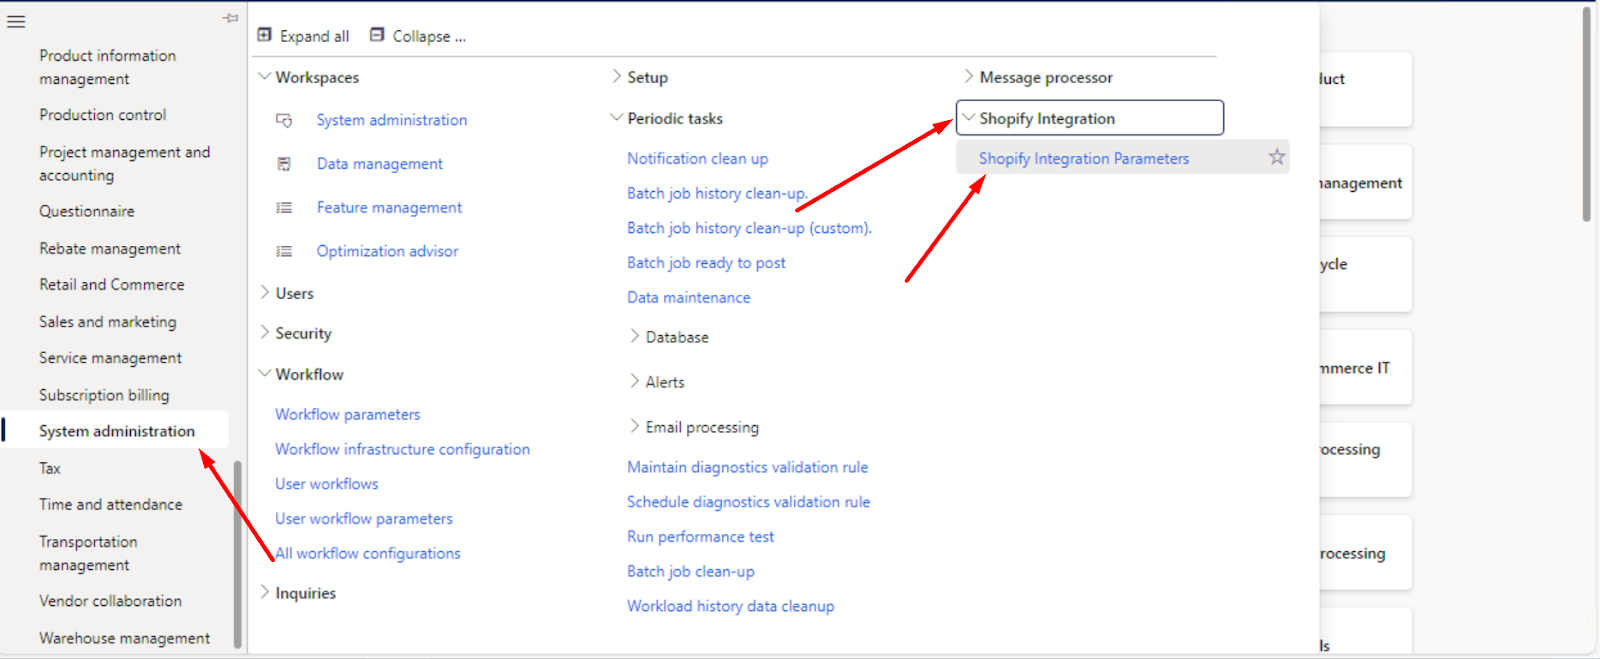
Click on Modules > System Administration > Shopify Integration > Shopify Integration Parameters.
Conclusion
This blog demonstrated how to create a setup table and page in Dynamics 365 Finance and Operations for securely storing Shopify API credentials.
In the next blog, we’ll focus on handling product updates and synchronization between Shopify and Finance and Operations.


Comments
Post a Comment