Optimizing Data Management in Business Central using Retention Policies
Introduction
Data retention policies dictate which data should be stored or archived, where it should be stored, and for how long.
When the retention period for a data set expires, the data can either be deleted or moved to secondary or tertiary storage as historical data.
This approach helps maintain cleaner primary storage and ensures the organization remains compliant with data management regulations.
In this blog, we'll be covering -
- Retention Policies.
- Retention Period.
- Record Level Filters for Retention Policies.
- Using Custom Tables in Retention Policies.
Pre-requisites
Business Central environment
References
Clean up Data with Retention Policy - Microsoft Learn
Details

In Business Central, we can define Retention Policies based on two main parameters -
The table which is to be monitored and the retention policy.
Retention Policy

Retention periods specify how long data is kept in tables under a retention policy.
These periods determine how often data is deleted.
Retention periods can be as long or as short as needed.
Applying a retention policy -
Retention policies can be applied automatically or manually.
For automatic application, enable the policy, which creates a job queue entry to apply it according to the defined retention period.
By default, the job queue entry applies policies daily at 0200, but this timing can be adjusted (refer below screenshot), preferably to non-business hours.

All retention policies use the same job queue entry.
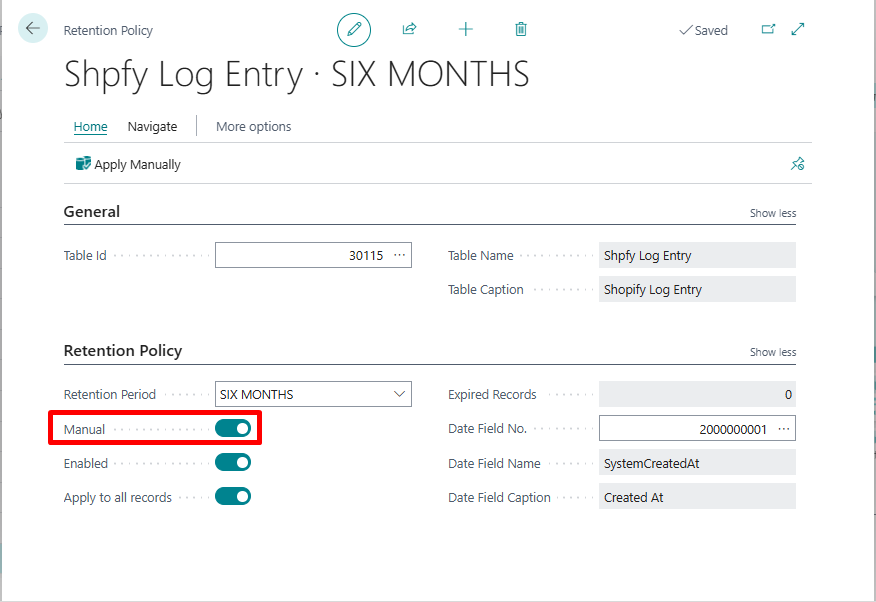
For manual application, use the "Apply Manually" action on the Retention Policies page and turn on the "Manual" toggle to prevent the job queue entry from applying the policy automatically.
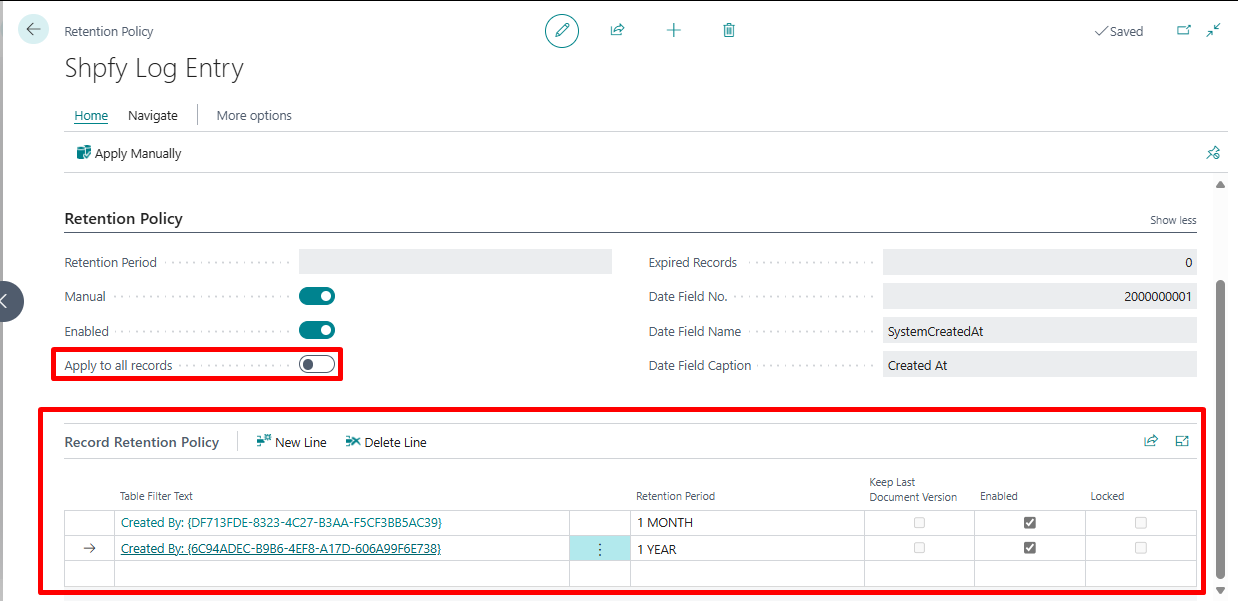
We can also exclude or include certain records based on filters.
Deselect the "Apply to all records" this will show a new tab where we can define the record filters.
Every such group can have it's own retention period.
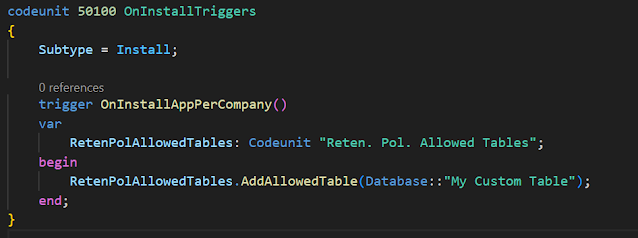
By default, only a few selected tables are shown in the table selection on the Retention Policy page.

If we want to include our custom table in this list, we'll have to do a small customization.
**You cannot add tables that belong to seperate modules, for example "Purchase Header" cannot be added in this list by you. Unless you work at Microsoft in which case you already knew this. **
So here I've created a small sample table.

And I've created an Codeunit with Install subtype where I'm adding my custom table to the allowed tables list.
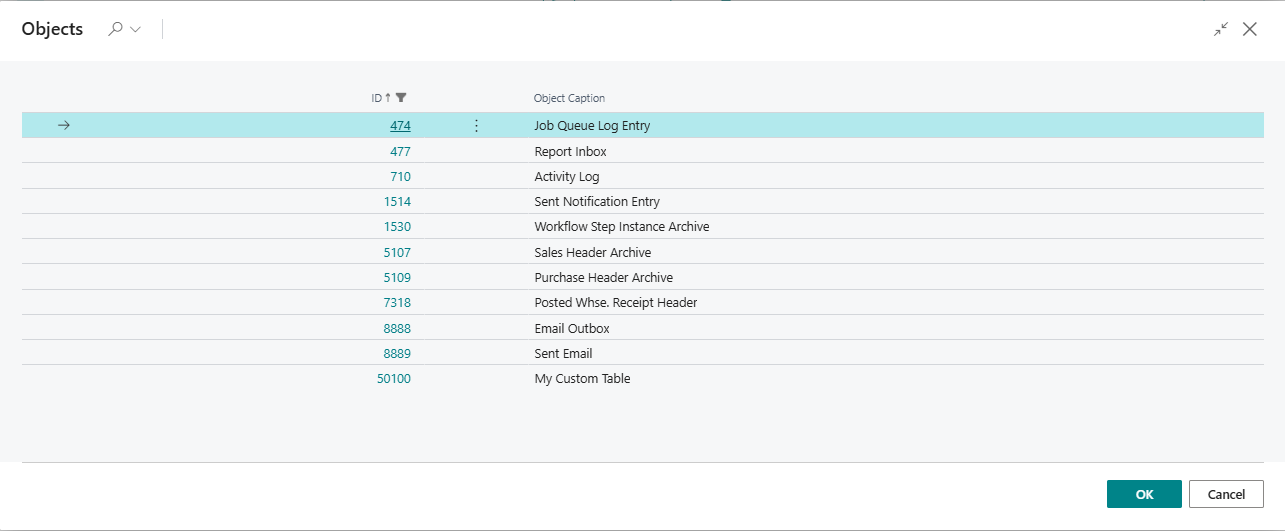
After deploying I can now see my custom table in the list.
Developers also have the option to set Mandatory or Default filters on the custom tables.
Mandatory filters cannot be removed and Default filters can be removed.
To create a mandatory/default filter -

Setting the "Mandatory" parameter to true, makes it Mandatory otherwise it's a default filter.
When I add the table ID on the "Retention Policy" I get the following entry created automatically.

If I try to remove the filters, I get the error -

Conclusion
Thus we saw how we can leverage Retention Policies in Business Central to reduce capacity wastage without heavy customizations.
Happy Coding!


Comments
Post a Comment