CI/CD with TFS for Finance & Operations
Introduction
There are 100 million developers around the globe who use Git. However, if you want to work with customizations in Finance and Operations, you need to learn how to use TFS. Initially, I was frustrated and confused about this requirement, but as I learned more about how projects are structured both locally and in TFS, things started to make sense.
TFS (Team Foundation Server) is Microsoft’s take on source control management, continuously released and improved since 2005. TFS keeps the source code centralized and tightly integrated with the Microsoft ecosystem. Despite the differences, if you are familiar with Git, transitioning to TFS shouldn’t be too difficult.
TFS shares similar concepts with Git, such as checking in, branching, merging, version tracking, and other standard features of a source control management system. Understanding these similarities can make learning TFS easier and help you leverage its full potential in Finance and Operations projects.
Pre-requisites
- Finance and Operations Development Environment.
- Azure DevOps access with TFS repository
Configuration
So, here we'll be starting with a new project.
(If you are working with an already created repository then you can skip ahead.)

Now, I'll be adding two folders here, "Main" and "Released".
Later, we'll convert them into branches from Visual Studio.
In TFS, we have the concepts of branches and in addition to that branches can contain folders as well.
Folders are used for organizing files and do not impact the version control flow directly.
They are simply a way to keep the repository structured and manageable.
Branches here (similar to Git) are used to manage different versions or lines of development in the repository.
They allow for parallel development and keep separate histories until changes are merged.


Now, let's head into our Development Enviroment and connect this project to Visual Studio.
I've clicked on "Continue without Code" for now.


Here, it says "Offline" as currently there's no Azure DevOps project connected to it.
So let's do that!

I'll click on "Manage Connections" and "Connect to a Project"

Here, as the project is hosted in my own organization on Azure DevOps,
I'll use the same credentials to log in.
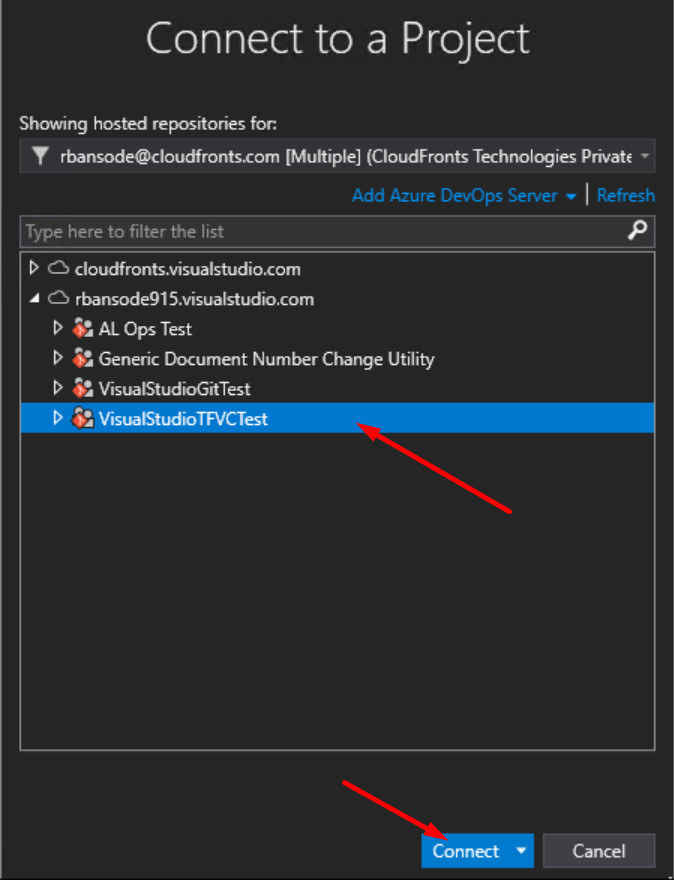
Here, we can see all the different projects I have created within my organization in Azure DevOps.
I'll click on the relevant one and click on Connect.

Here, we see the 3 sections in the Team Explorer view.
1 - Which credentails are being used to connect.
2 - The name of root of the project and where it is planning to download the content from TFS.
3 - The different components where we'll be doing most of our work once the initial set up is completed.
For now, I'll just click on "Map & Get"


Next, we click on the Source Control Explorer to see the actual content of the TFS server.
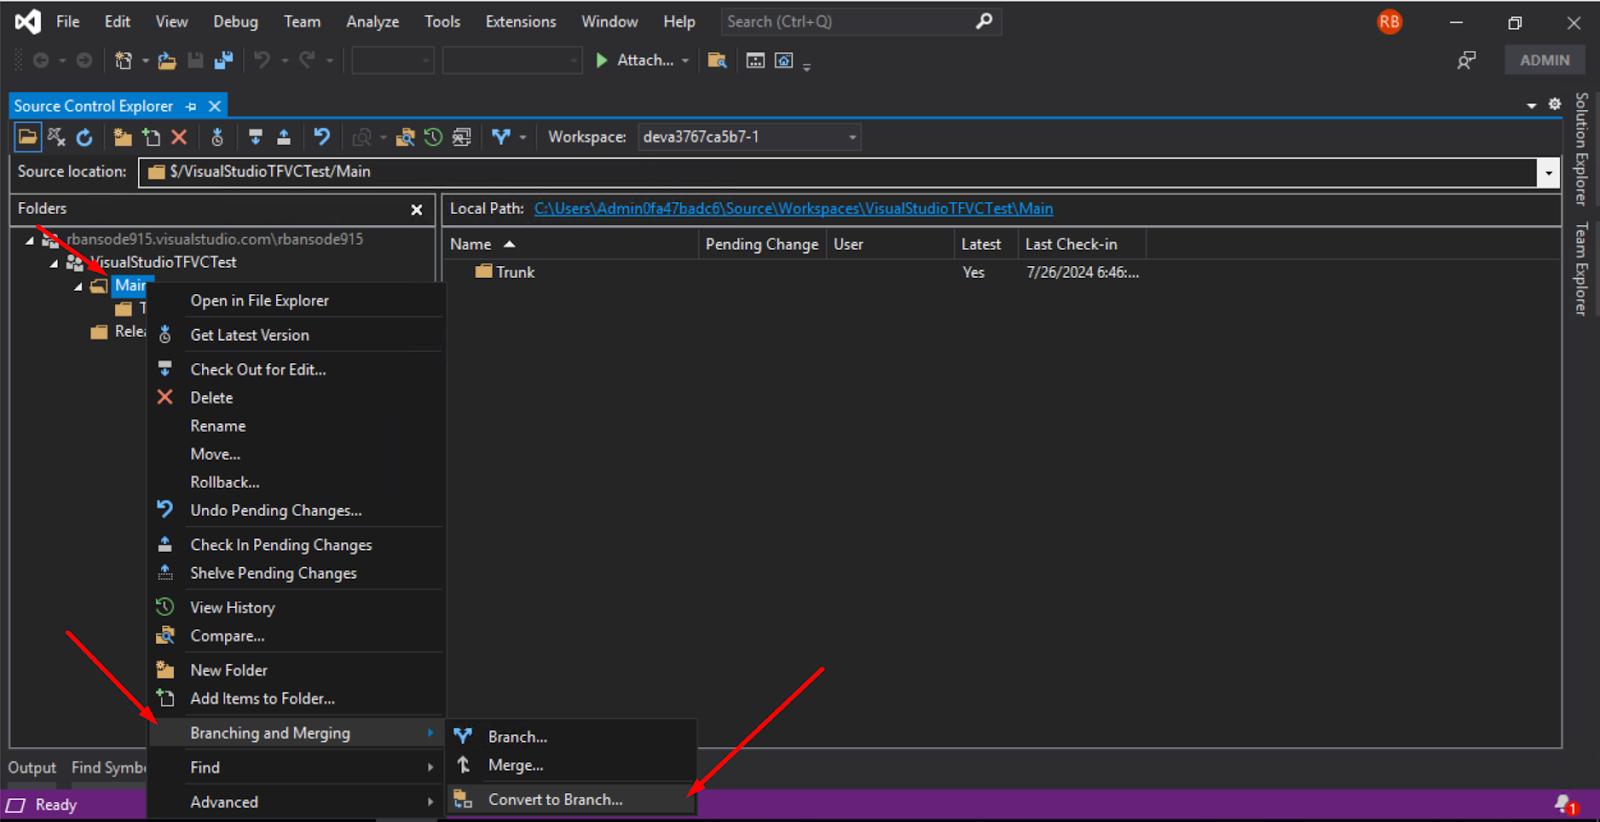
Now, we can convert the "Main" and "Release" folders into Branches.
We can do this by right clicking on the folder -> Branching and Merging -> Convert to Branch

After converting them to Branches, the icon next to them changes.

Next, I'll right click on my "Main" branch and add two new folders here.
"Metadata" and "Projects"
Now, before we can use these folders anywhere, we need to "push" these changes to the TFS.
For that, we right click on "Trunk" folder and click on "Check in Pending Changes".


Now, we add a comment here describing what changes have been done (similar to a commit message)
At the bottom we can see the files that have been created or modified.

Once the check is done, we can see that the "+" icon next to the folders disappears and we get a notification that the checkin has been completed successfully.
Now, this is where TFS shines through as better source control management for Finance and Operations.
In (FnO) models and projects are stored in separate folders.
Using Git for this setup can be tricky, as it would either mean managing two different repositories or dealing with a huge .gitignore file.
TFS makes it easier by letting you map local folders directly to TFS folders, simplifying the management process.

Here, we can see that currently, our mapping is a bit different than what we need, this is because of the "Map & Get" we did initially.
So, to change that mapping, click on "Workspaces"

Then click on "Edit"

Now, we click on a new line to create a new mapping.
Here, I'm creating a mapping between the "Metadata" folder in the "Main" branch of the TFS and the "PackageLocalDirectory" the place where all the models are stored for my system,


Now, I'll create another mapping between the Projects Folder and the local folder where my projects are stored.

Now, once I click on "OK" it'll prompt me if I want to load the changes.

Click on "Yes" and move forward.

But nothing changes here in Source Control Explorer.
That's because the Source Control Explorer shows what is stored in the TFS.
And right now, nothing is; so we'll have to add some models or projects here.
Either we can add existing ones or we can create a new one.
Let's try to create a new model.
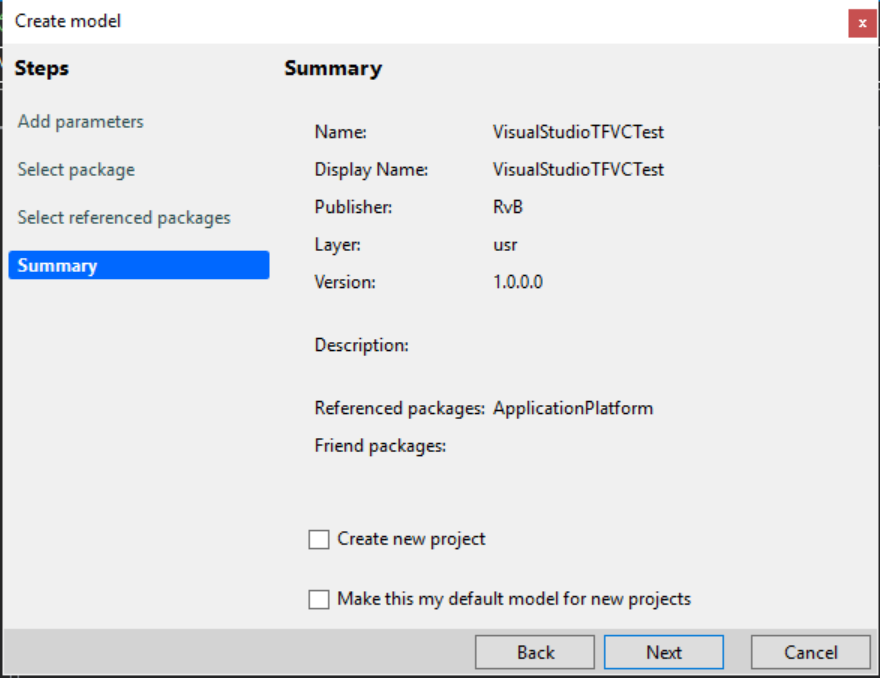
Now, that the Model is created we'll need to add it to our Source Control.
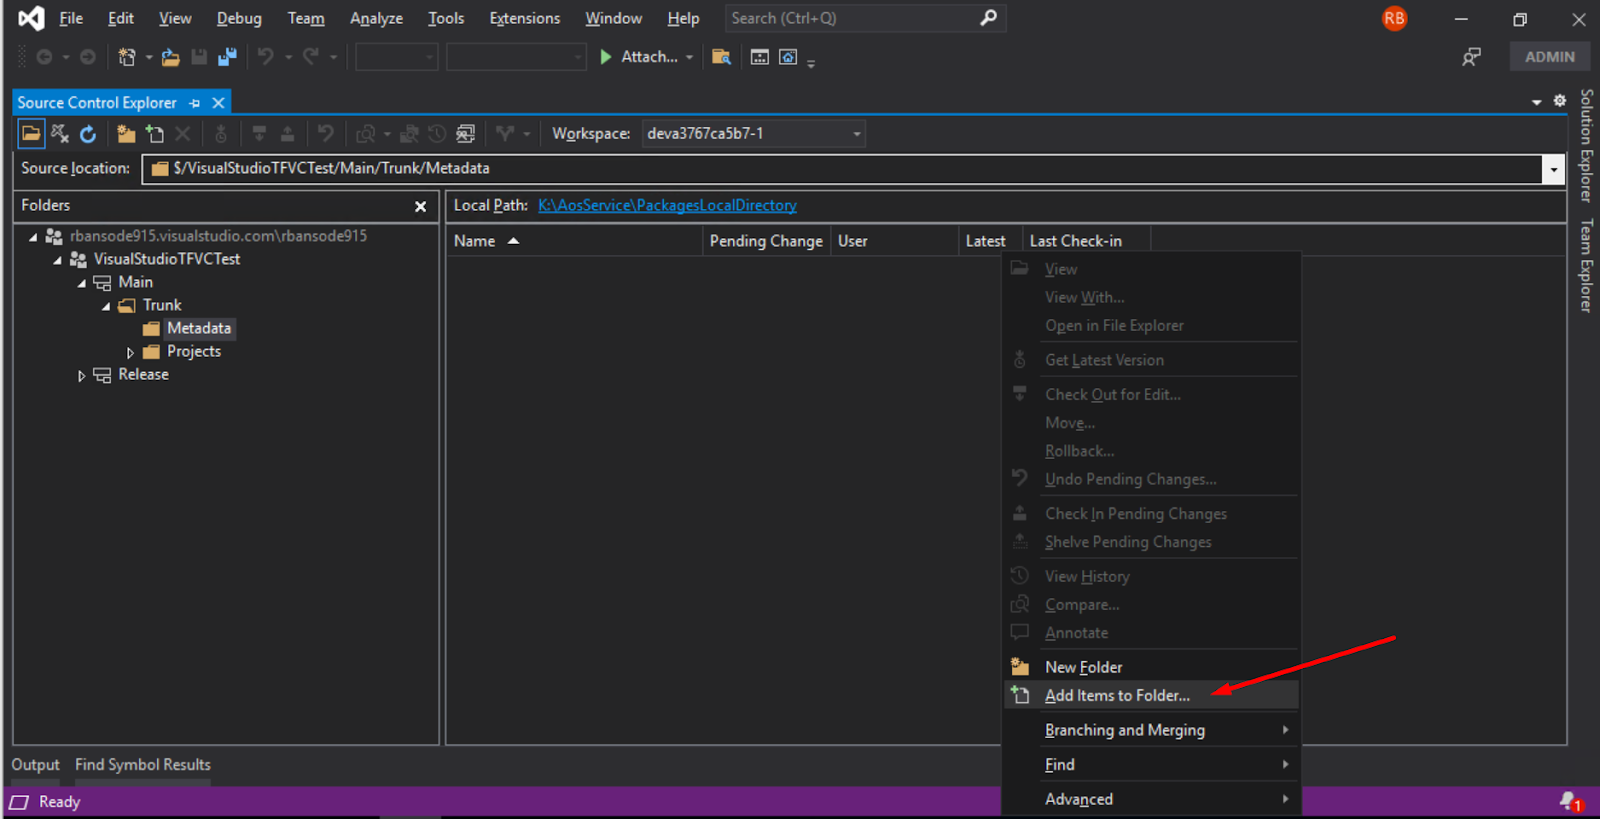
Click on the blank space within the "Metadata" folder and select "Add Items to Folder"
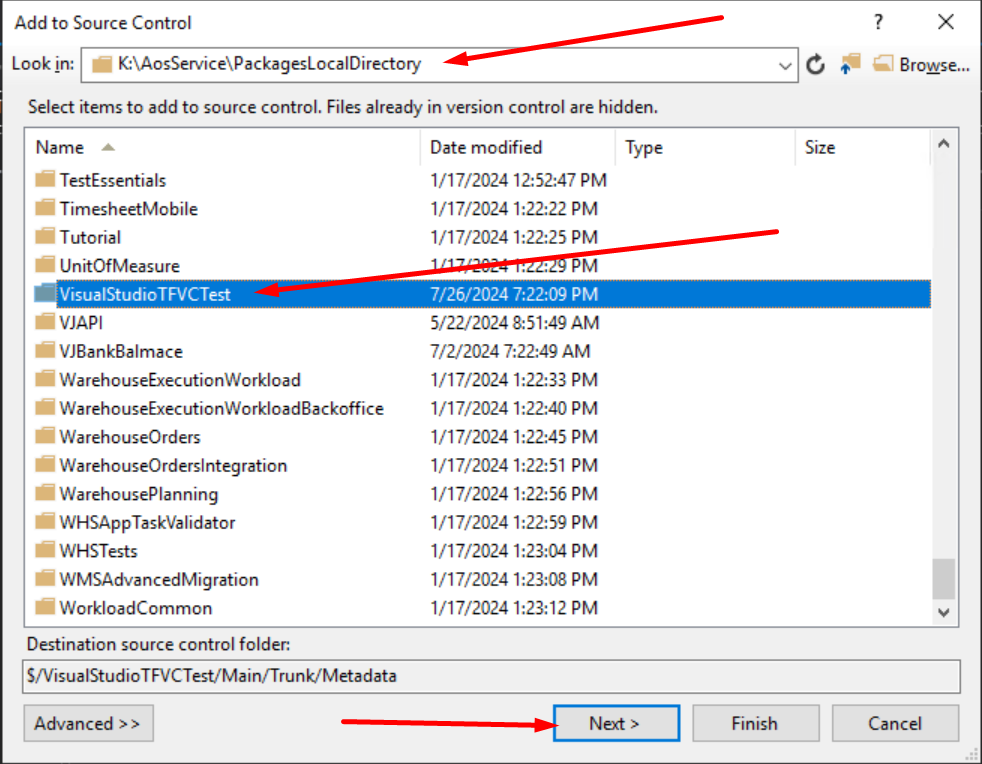
In the window, we can see that because of the mapping, we are sent to the local directory "PackageLocalDirectory" and we can see our model inside it.
Select that and click on "Next".

In the next view, we can see all the files and folders contained within the selected folder.
Out of these, we can exclude the "Delta" folders.

After, this we are left with these folders for the different elements.
We can remove the content from the "XppMetadata" folders as well.

Which leaves us with just the Description xml file.
**Please do not exclude the descriptor file as without it Visual Studio will not be able to refer to your model or it's objects, even if they are available in the local directory**
After this, we click on Finish.

Here, we can see that our model is now visible in the "Metadata" folder.
I'll do the same process for a model which has some elements in it.

This model had a lot of elements, so even after removing the "XppMetadata" folders and the "Delta" folders there are still 196 elements.
So I'll click on Finish and add this as well.

Here, we can see both of our models are now available.

Before moving forward, we'll do a quick check-in for these by clicking on the "Team Explorer" on the right and clicking on "Pending Changes"

Now, we'll create a new projects using the Model that we created.


Here is my new project with my new model.

In the "Solution Explorer" view, right click on the Solution and click on "Add Solution to source control"

After that, we can see the "+" icons indicating these objects are being tracked by source control.
Now, I'll add a few simple EDTs element to my project.

After that, I'll select my newly created elements and click on "Add files to Source Control"

After that, we can see that our files are available in the "Source Control Explorer" as well.
Once, we are done we can click on "Check In" to push these changes to the TFS Server.

If we go back to Azure DevOps, we can see our structure.

We can browse the files at a particular change set as well, similar to Git.
Conclusion
Thus, we saw how to configure TFS for Finance and Operations projects.
This is the first step towards automated testing and creating a full fledged CI/CD pipeline.
Comments
Post a Comment